Crispy Sourdough Discard Brownies
Highlighted under: Timeless Desserts
I’m excited to share my recipe for Crispy Sourdough Discard Brownies, a delicious way to utilize leftover sourdough starter! I love how the tang from the sourdough adds a unique twist to traditional brownies, giving them a depth of flavor you wouldn't expect. With a crispy top and fudgy underneath, these brownies strike the perfect balance between texture and taste. They come together quickly, making them a great last-minute dessert for gatherings or an indulgent treat for myself after a long day.
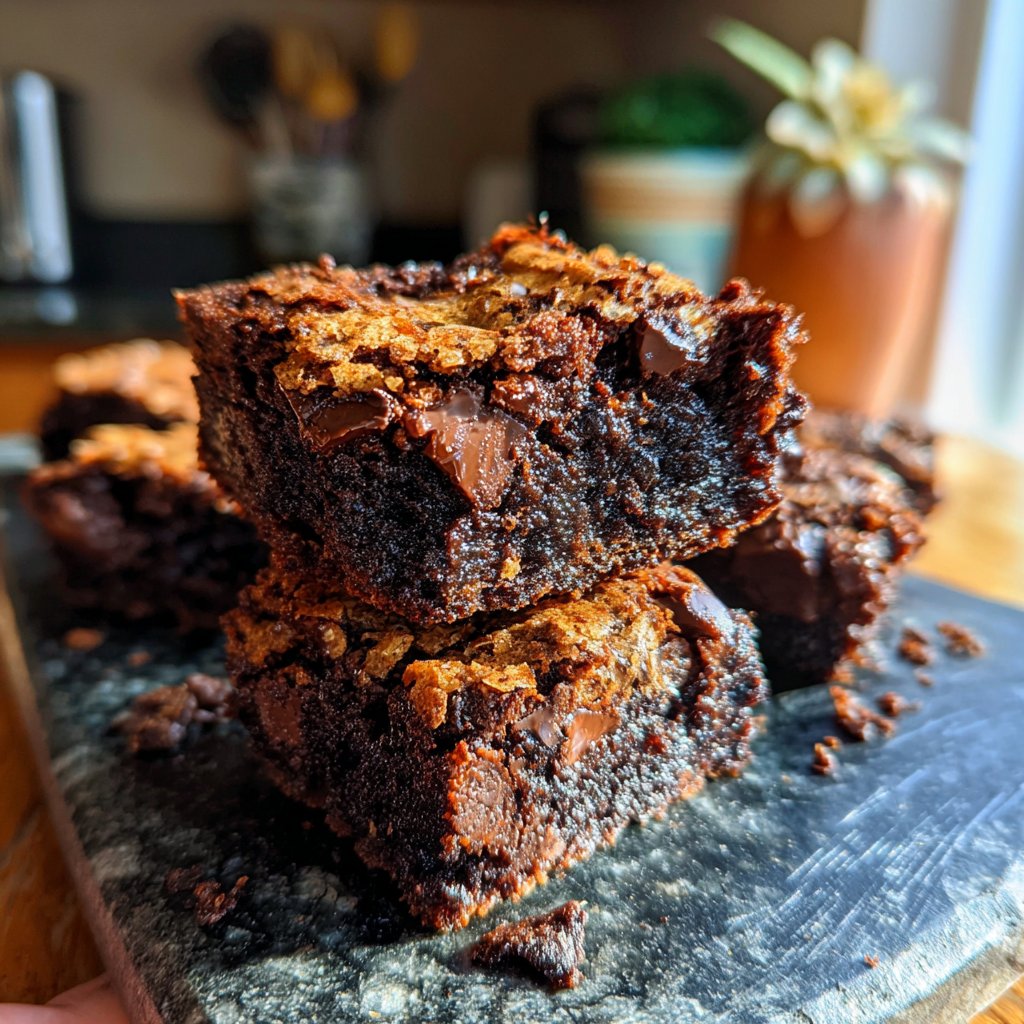
When I was experimenting with ways to use my excess sourdough starter, the idea of brownies struck me. I combined traditional brownie ingredients with the starter, and the result was something special! The brownies came out beautifully crispy on the outside and decadently chewy on the inside. I especially appreciate using the sourdough, as it not only reduces waste but elevates the chocolate flavor.
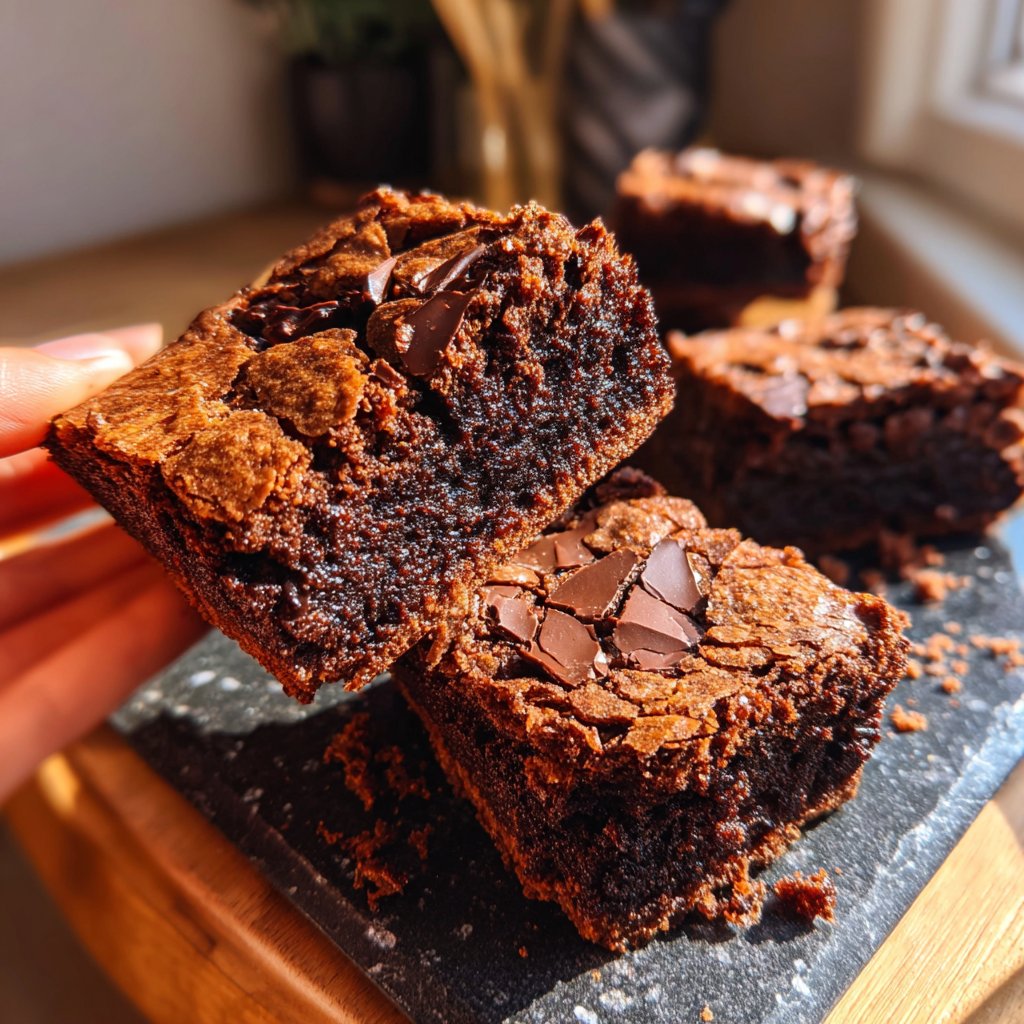
One tip I have is to allow the brownies to cool completely before cutting them. It helps them set and makes for cleaner edges when slicing. These are now my go-to dessert to share at potlucks, and they’re always a hit!
Why You'll Love These Brownies
- Rich chocolate flavor complemented by the unique tang of sourdough
- Crispy top with a fudgy center that melts in your mouth
- A wonderful way to reduce kitchen waste while treating yourself
Understanding the Sourdough Starter
The sourdough starter plays a crucial role in these brownies, contributing both flavor and moisture. Its natural acidity enhances the chocolate's richness, creating a balanced taste profile that’s far more complex than traditional brownies. If you're using discard that's been in your fridge for a while, make sure it's still active enough to impart a pleasant tang. If unsure, a quick sniff test can reveal if it’s still fresh.
When incorporating the sourdough starter, ensure it's at room temperature for better blending with the other ingredients. If your starter is particularly thick, you can loosen it with a splash of water or milk before adding it to the mixture. This will help achieve the desired fudgy consistency without compromising on the texture.
Achieving the Perfect Texture
For that coveted crispy top combined with a fudgy interior, it's essential not to overmix the batter once you've added the dry ingredients. Mix just until the flour is incorporated; this prevents gluten from developing too much, which can make the brownies dense rather than delightfully chewy. You’ll know you’re on the right track when the mixture has a slightly glossy appearance before pouring it into the baking pan.
Baking times can vary slightly depending on your oven and pan material. A metal pan tends to result in a faster bake than a glass one. Keep an eye on your brownies—you're looking for the edges to pull away from the pan slightly and a toothpick to come out with a few moist crumbs rather than completely clean.
Serving and Storage Tips
Once cooled, cutting these brownies with a sharp knife ensures clean edges, giving them an appealing presentation. For a fun twist, consider drizzling some melted chocolate or serving them with a scoop of vanilla ice cream to contrast with the rich chocolate flavor. They also make excellent gifts wrapped in parchment paper and tied with twine to showcase their rustic charm.
To store leftover brownies, place them in an airtight container at room temperature for up to 4 days. You can also freeze them for longer storage—just wrap them well in plastic wrap and place them in a freezer-safe container. Thaw them overnight in the refrigerator or enjoy them straight from the freezer for an extra chewy treat.
Ingredients
For the Brownies
- 1 cup unsalted butter, melted
- 2 cups granulated sugar
- 4 large eggs
- 1 teaspoon vanilla extract
- 1 cup all-purpose flour
- 1 cup cocoa powder
- 1/2 teaspoon salt
- 1 cup sourdough starter (discard)
Make sure all your ingredients are at room temperature for the best results.
Instructions
Preheat the Oven
Preheat your oven to 350°F (175°C). Grease a 9x13 inch baking pan or line it with parchment paper.
Mix Wet Ingredients
In a large bowl, combine the melted butter and granulated sugar. Stir until well mixed, then add eggs one at a time, mixing well after each addition. Stir in the vanilla extract.
Combine Dry Ingredients
In a separate bowl, whisk together the flour, cocoa powder, and salt.
Combine Mixtures
Gradually add the dry ingredients to the wet ingredients, stirring until just incorporated. Fold in the sourdough starter until fully mixed.
Bake
Pour the brownie batter into the prepared pan and spread evenly. Bake for 25 minutes, or until a toothpick inserted comes out with a few moist crumbs.
Cool and Serve
Allow the brownies to cool completely in the pan before cutting into squares. Enjoy!
For best texture, let the brownies sit for a few hours or overnight before cutting.
Pro Tips
- To enhance the chocolate flavor, consider adding chocolate chips or nuts into the batter before baking.
Ingredient Substitutions
If you're looking to make these brownies dairy-free, substitute the unsalted butter with a vegan butter alternative or coconut oil. For the eggs, a simple blend of ground flaxseed and water can work well as a replacement. Mix 1 tablespoon of flaxseed meal with 2.5 tablespoons of water and let it sit for about 5 minutes until it thickens, acting as a great binder for the batter.
For a gluten-free version, consider using a gluten-free flour blend instead of all-purpose flour. Ensure that the blend contains xanthan gum to help mimic the texture usually provided by gluten. Additionally, adjust your baking time slightly, as gluten-free batters can behave differently in the oven.
Troubleshooting Common Issues
If your brownies come out too cakey, this may indicate that they were overmixed or overbaked. Remember to mix just until combined and check your brownies a few minutes before the suggested baking time. If they seem too wet when testing with a toothpick, allow them a few extra minutes in the oven but keep a close eye to prevent drying them out.
For brownies that turn out too dry, it could be due to an incorrect measurement of flour or cocoa powder. Using a kitchen scale to weigh these ingredients can help achieve greater accuracy. Moreover, be cautious about the baking time; it's better to err on the side of underbaking if you're unsure, as they will continue to firm up as they cool.
Questions About Recipes
→ Can I use active sourdough starter instead of discard?
Yes, but it may change the texture slightly. Just ensure it’s at room temperature.
→ How do I store the brownies?
Store the brownies in an airtight container at room temperature for up to 5 days.
→ Can I freeze these brownies?
Absolutely! Wrap them tightly and freeze for up to 3 months. Thaw at room temperature before serving.
→ What if my sourdough starter is not thick?
A thinner starter can still be used, just be sure to adjust the flour slightly if the batter seems too runny.
Crispy Sourdough Discard Brownies
Created by: Adele Summers
Recipe Type: Timeless Desserts
Skill Level: Intermediate
Final Quantity: 12 brownies
What You'll Need
For the Brownies
- 1 cup unsalted butter, melted
- 2 cups granulated sugar
- 4 large eggs
- 1 teaspoon vanilla extract
- 1 cup all-purpose flour
- 1 cup cocoa powder
- 1/2 teaspoon salt
- 1 cup sourdough starter (discard)
How-To Steps
Preheat your oven to 350°F (175°C). Grease a 9x13 inch baking pan or line it with parchment paper.
In a large bowl, combine the melted butter and granulated sugar. Stir until well mixed, then add eggs one at a time, mixing well after each addition. Stir in the vanilla extract.
In a separate bowl, whisk together the flour, cocoa powder, and salt.
Gradually add the dry ingredients to the wet ingredients, stirring until just incorporated. Fold in the sourdough starter until fully mixed.
Pour the brownie batter into the prepared pan and spread evenly. Bake for 25 minutes, or until a toothpick inserted comes out with a few moist crumbs.
Allow the brownies to cool completely in the pan before cutting into squares. Enjoy!
Extra Tips
- To enhance the chocolate flavor, consider adding chocolate chips or nuts into the batter before baking.
Nutritional Breakdown (Per Serving)
- Calories: 250 kcal
- Total Fat: 15g
- Saturated Fat: 9g
- Cholesterol: 80mg
- Sodium: 70mg
- Total Carbohydrates: 28g
- Dietary Fiber: 2g
- Sugars: 20g
- Protein: 3g